Showing posts with label Tips and Tricks. Show all posts

Sunday, November 29, 2015

Super Salad Sunday: Caesar Salad


Now that the Thanksgiving holiday is over and done with, we all feel properly bloated and somewhat terrified about the fact that this is just the beginning of the holiday eating season, with office parties, fancy dinners, and more holidays. In between all the festivizing, I plan on eating light at home. 

This Caesar salad is adapted from Harold Dieterle's Kitchen Notebook cookbook (link is not an affiliate). It's tangy and very delicious. J grilled up some chicken for us to toss on top of this salad, so it was a complete meal in and of itself. If you have the ingredients in your pantry/fridge, this is a very easy meal to throw together after working late. I will give this disclaimer: There are no croutons, because I do not like them. But you could add them, of course.


Total prep time: 25 minutes

Total cook time: None, unless you are making a protein

What you will need: 

1+ heads of romaine lettuce (you can buy it pre-shredded if you prefer)
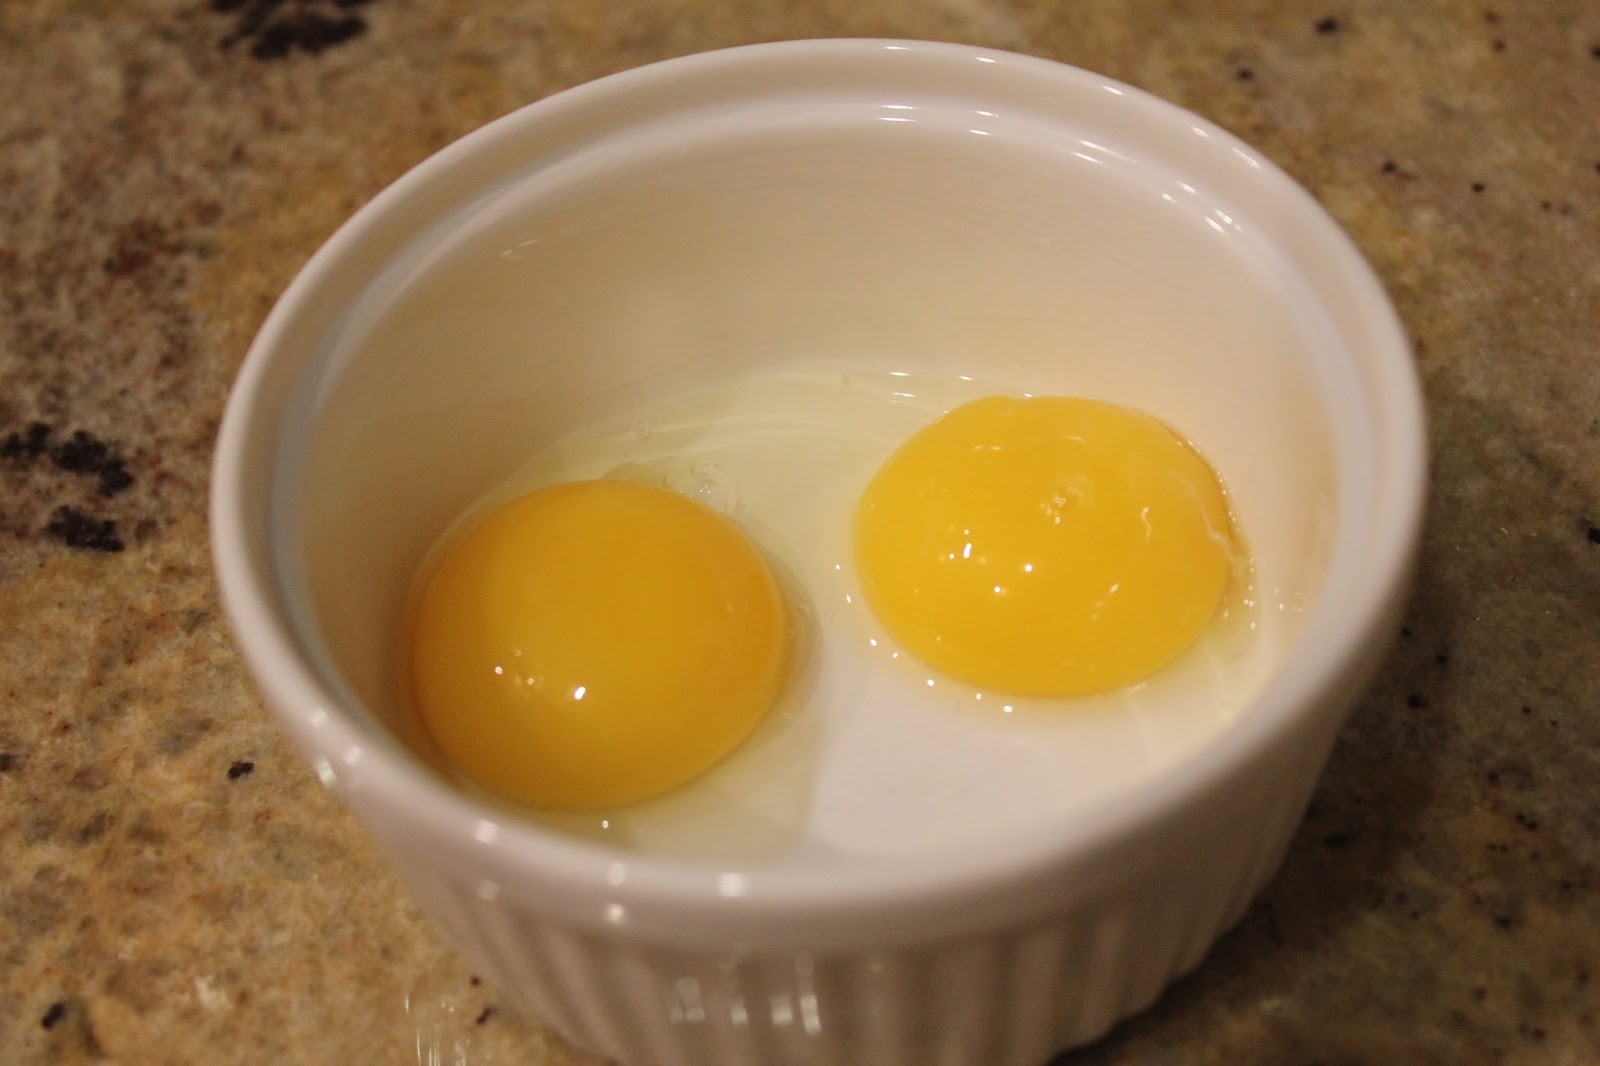
2 large egg yolks (which requires you to separate the eggs)
2 tbsp fresh lemon juice (I did not have a lemon in my fridge, so I used the substitute. It still tasted good)
2 anchovy filets (preferably packed in oil)--get a good tin of anchovies. The difference is noticeable.
2 small garlic clove
1 tbsp Worcestershire sauce
1/2 blended or neutral oil (Canola is my oil of choice)
1/2 tbsp Dijon Mustard
1/3 cup freshly grated/shredded parmesan/reggiano cheese
kosher salt and plenty of black pepper, to taste

Useful equipment: Mini food processor or blender. 

Shred your romaine and place to the side in a large bowl. Dieterle's recipe calls for 4 cups of shredded romaine, which is one decent sized head of romaine, but when I made the dressing recipe, I found that this really overly dressed 4 cups. So you can either reduce your measurements on the dressing, or add more romaine. I chose to add more romaine, because let's face it, after a tough day of work, who wants to do math? 

Next, in a small bowl, separate your eggs. Here's trick: Make sure you separate them in to separate bowls. The last thing you want is to mess up your first egg by breaking the second egg into a separated bowl. Also, some people are able to separate an egg using their hands or the eggshell itself. I applaud those people, but I am certainly not one of them. I use an egg separator, which also happens to make me smile.


In a food processor or a blender, combine the egg yolks, Worcestershire sauce, garlic (you should roughly chop the garlic cloves), mustard, lemon juice, anchovy filets (also roughly chopped) and a good dash of black pepper. 


Start combining until it turns into a liquidy-ish paste, then start adding your neutral oil. 


Dieterle says you should add it in a slow stream so as to allow it to emulsify, but the food processor I was using doesn't have a way for me to add mid-chop, so I just stopped it every few seconds and poured a little more oil in.


As the oil is added and you continue to blend/process, the dressing thickens up and becomes very delightfully creamy. You should start taste testing at this point and see what you think needs to be added. For example, I add way more lemon juice and garlic and black pepper than Dieterle calls for because those are the flavors I really like in my Caesar dressing. But it's all up to you!


Mmmm, thick, creamy dressing. Lightly toss your romaine dressing in it, plate, and top with an abundance of fresh cheese (you could also add cheese while you blend the dressing to make it extra cheesy).


Serve (if you're going to serve with protein, add that now), and enjoy!


Saturday, November 21, 2015

Bailey's (Bourbon) Pecan Pie


It's the most wonderful holiday of them all. Thanksgiving is just around the corner. Whether you are making your own holiday feast, or you have been commissioned to "bring something small" to someone else's gathering, this pecan pie will surely please everyone and is VERY impressive.

I will admit that I approach pie-making with some trepidation. Baking is not my forte; there's too much of a need to be "exact" with measurements, and quite frankly, I think it takes too long. But I know that having a good pecan pie in one's repertoire is important, so I commissioned my friend Bailey to teach me how to make this delightful treat. She even makes her own crust!

Prep time: 45 minutes

Cook time: 45-55 minutes

Cool time: 30 minutes

Total time from prep to pie-eating: 2-2.5 hours. Like I said, not for the quick gourmand at all.

What you will need:


*Pie Crust Ingredients: 
2 sticks of unsalted butter
10 1/2 oz  (dry) all purpose flour
2 oz (liquid) buttermilk
1 tsp kosher salt
1/4 oz (dry) white sugar
(optional: 1/2 tsp vanilla extract)

*Note:  This recipe theoretically makes two pie crusts if you are using shallow pie tins. Shallow tins are not as awesome because they don't allow you to have a very filling pie. So I say this makes enough crust for one decent sized pie, and you have some left over you could use for a lattice top if you were ever making a lattice-topped pie. 

**Pie filling Ingredients: 
5 eggs
5 oz (dry) light brown sugar
1 stick unsalted butter, melted and somewhat cooled
1 1/2 tsp vanilla extract
1/2 tsp salt
1 cup dark corn syrup
1 cup light corn syrup
8 oz. pecan pieces (you can buy them ready in pieces or you can get pecan halves and chop them yourself)
Reserve some pecan halves for the top to decorate
1 "glug" of bourbon (optional)

**Another Note: This is supposed to fill two pies. Again, if you're using shallow pie tins. It filled one deep dish pie tin and it is absolutely delicious so I really recommend going that direction. 

I would also like to point out that you can completely ignore all of the directions for the pie crust here and you could just buy frozen pie crust from Pillsbury. I'm a big believer in "let the experts do their work," but Bailey's pie crust seemed pretty manageable if you have the time.

To make the pie crust: 

Cube your butter into small manageable pieces:


Put the butter and the flour in the bowl of your Kitchen Aid, or some large mixing bowl.


In a Kitchen Aid stand mixer with the paddle attachment, start mixing them on the lowest speed for about 1-2 minutes


In a pour measuring cup, combine the 2 oz. buttermilk with 1 tsp kosher salt and .25 oz of white sugar, and stir, letting the salt and sugar dissolve


Add the buttermilk mixture to the flour/butter mixture and put it back on the lowest (1-2) speed for about 2-3 minutes. You will have to hold the mixer down probably as it mixes the butter.


You will know when it is ready when all of the dough sticks together and comes cleanly off the sides of the mixing bowl. There is no dough left in the bottom of that bowl in the picture above. 

Pull the dough off the mixer and roll into a ball, then pound flat and store in a large ziplock bag. You want to let it "chill out" for at least 20 minutes in the fridge (no big deal since you're going to be making your filling now).


For your filling: 

Melt the stick of butter in your microwave. Then, set it aside to let it cool for a little bit. Bailey explained that if you mixed the piping hot butter with the eggs right away, you would start to have scrambled eggs, which is NOT a key component to pecan pie. 


Combine the brown sugar, eggs and butter in a mixing bowl and whisk together well. Then add your salt and vanilla to this mixture and whisk again.


Combine your light and dark corn syrups in a separate measuring cup.


Now add the corn syrup mixture to the egg/sugar mixture above and whisk some more. If the corn syrup is stubborn, use a silicon spatula to get it all out of the measuring cup. If you are going to add in some bourbon, now is the time to do it. A word of caution: I added way too much bourbon. Apparently, a few tablespoons is the way to go. 


Add in 4 oz of pecan bits, and mix again.


Ok! Time to turn our attention back to the pie dough. Now is a good time to pre-heat your oven to 350.

Bailey found these really great pie dough mats at Home Goods and she says they cost $5. I am going to go purchase one. They have different sizes of the crusts you'd want to use and help you make it circular. The oil/wine/vinegar is keeping the mat spread out. Put flour on the mat so the dough doesn't stick.


Start rolling out your pie dough. Bailey has a fancy non-stick rolling pin which she put additional flour on. Since I am a very amateur baker, I will let you know that I use a wine bottle on the random occasions I have to bake, and it works fine too. 


Roll the dough to about 1/4 inch thickness. Then, grease and flour your pie tin. Bailey has a great ceramic pie tin we used, and she sprayed it with Pam and put some flour in it.


Then she did this really neat trick to get the pie crust dough in the actual pie tin (something that caused me a great deal of worry, because if it was up to me, I promise you that would be one holey pie crust). She DRAPED THE PIE CRUST OVER THE ROLLING PIN AND ROLLED IT INTO THE TIN.


THIS IS REVOLUTIONARY! Of course, I did not try this trick, so I can't tell you if it's actually as easy as she makes it look, but she swears it's not difficult. Report back and let me know if she's correct.

Then she pressed the pie crust into the tin fairly loosely and cut the excess off. She has a cute little pastry cutter but she tells me that if you don't, you can just tear it off against the sides of your pie tin.


And voila! Pie crust!


Now, this is not a pie which requires any pre-baking. Bailey explained to me that you would pre-bake the crust for a heavy fruit-filled pie possibly. But not this one. So just go ahead and pour your filling in to the pie crust. You want it to ALMOST come to the top.


You can leave the pie like so, or you can decorate the top with whole pecan halves. Bailey and I opted for the latter.


Then, we stuck it in the oven for 55 minutes. It was in for this long because of how deep it is, but typically, the pie should only take about 45 minutes to cook. Less time if you're making two shallow pies.


Pretty good if I say so myself! It tasted delicious, but took a little while to congeal, so I just stuck it in the fridge. Now, go out there and impress your Thanksgiving guests/hosts. Serve, and enjoy!!!


Thursday, June 13, 2013

Horseradish and Herb Crusted Standing Rib Roast

I know,  I keep promising that I will come back. And then I come back for one or two posts and then I vanish. But this time, since things have died down a bit in my personal life, I promise I'm back. For real. You see, the wedding is over! We are married! And now I have TONS of fun wedding gifts for the kitchen to play with. My posts in the future should be more aesthetically pleasing, at least. 

This is a very impressive dish that is actually quite easy to make. My mom originally gave me this recipe and I make it pretty much any time I see a standing rib roast on sale at Publix. The great thing about the dish is that it's easily modifiable based on how many people you're having for dinner, and once you get it in the oven, it's very low maintenance. And it's VERY pretty.

Oh, and by the way, I've come up with a new trick for the blog. Whenever there is a step or a tip that I have that is optional, but will really elevate the end product, I'll insert it with the heading "Gourmet Tip."

Total Prep Time: 15 min (not counting time it may take to soften butter and let meat come to room temperature)

Total Cook Time: 1.5 hrs-3 hrs depending on size of roast

Ingredients:


Standing Rib Roast (the size you get will depend on the number of people you are cooking for. The general rule of thumb is that one rib will typically feed about two people, but since we are typically hungrier, I try to think more that one person will eat 2/3 of a rib--also they typically don't sell them any smaller than two ribs at a time, otherwise it's just a bone-in rib-eye steak)
1/2 cup bread crumbs
3 tbsp prepared horseradish
3 tbsp softened butter
finely minced thyme, rosemary and sage to taste
salt and black pepper to taste

Gourmet Tip: Meat cooks so much better if you bring it out of the fridge anywhere from 15 minutes to 30 minutes before you plan on cooking it. Why? You want your meat to rise to its cooking temperature quickly--whether you are searing it or roasting it. Otherwise there's a better chance the meat will steam, which will leave it colorless, crustless, gray and rubbery. Or just won't have as good of a texture. My tip is to just pull the meat out of the fridge before you do any of your prep work and set it on the counter so it can warm up a little bit. I typically will open the package, rinse the meat, and then let it dry on some paper towels and covered loosely by a paper towel, since we all know that dry meat cooks better than wet meat.

Preheat your oven to 350. 

If you have softened butter by leaving it on the counter, good for you. I commend you. Otherwise, put your butter in a microwave safe bowl (don't slice it, just put the whole hunk in there) and nuke it for 10 seconds. You want it to come out at this consistency:


Add the horseradish and the finely minced herbs to the butter and mix well, creating a paste.


You want there to be enough herbs in the butter mixture so that you can see them, but you don't want to be entirely herby. I can't tell you how many sprigs of each herb to use, but try to evenly distribute them throughout the butter mixture.

Place your roast a small roasting pan where your standing rib roast fits snugly (I typically use a square 8X8 non-stick pan for a smaller roast). Salt and pepper all surfaces of the roast. Then, stand your roast up so that the bone is closest to the pan, and coat the top of the roast with your butter mixture.


After you evenly coat the butter mixture on top of the roast, sprinkle with bread crumbs. If you want to get super fancy, you can put parmesan cheese in with the bread crumbs, but just a tiny bit.


Then, put your roast in the oven. For cooking times, I have calculated that the roast cooks best at approximately 22 minutes per 8 ounces. That will give you a pretty rare roast, but I'd rather you undercook at first, and then put a meat thermometer in to find out it needs a little more time, rather than end up with an overcooked piece of meat. 

When you check the temperature, make sure you don't touch the bone with the meat thermometer. I like to check it in a couple of places in the center of the roast so that I can get an "average" reading. For medium rare center, you want the center to be at about 140. Remember, you're going to let it rest for about 15 minutes after you pull it out, and the temperature will continue to go up about five degrees.

Shhh, it's resting.
After you let it rest (some people tent tin foil over it while it rests but I tend to find that this steams the crust that I worked so hard to make crispy), you will slice it and serve. The best way to slice is to go vertically between the bones, then carve off of the bones. 


Serve, and enjoy!!!


Friday, September 14, 2012

Menu Planning and Effective Grocery Shopping

One of the biggest excuses I hear from my fellow workaholics is that they cannot cook gourmet-ish food and must eat sad little lean cuisines because grocery shopping takes too much time and they never have the right things in their houses to make what they want when they get home from work. 

I have the solution. It will revolutionize the way that you grocery shop. It's called...the Plan and Plot method. It takes a little bit of time on a Sunday, but trust me, it will make your life so much easier, and coincidentally, will lower your grocery bill.

The first thing you must do is you must take one sheet of paper and plan out your menus for the week. I typically restrict planning in such detail to dinners, as I either eat lunch out or eat leftovers or scavenge. This method is also good for planning a big holiday meal, such as Thanksgiving (or in my example, Rosh Hashanah lunch). 


So here we have a menu that I have created for a lunch I am hosting on Rosh Hashanah. Typically, my menu plan would just have "M, T, W, R & F" listed in the spots where 1-5 are listed on this menu. Put down every thing you plan on having for dinner--from sides to veggies to sauces/condiments and main dishes.

If you do not know your recipes (or your pantry) well, I would suggest you take a second piece of paper and list every single ingredient you're going to need for each dish, including the quantity. It doesn't matter what order you're putting it in yet, just list everything. Then, take that list and go into your kitchen and cross off the ingredients that you already have in your house. If you have any doubt whatsoever about whether you have it, go check. I'm serious, you'll thank me later. And make sure you have sufficient quantities (for Thanksgiving, this typically means I have to buy several extra pounds of butter). I didn't do it with this round of menu planning because I know my pantry well and I know these recipes like the back of my hand. I'll let you know next week whether this omission will backfire.

Then, take a third/second piece of paper, and divide it into four quadrants. At the top of each quadrant, you will list the following headings:

  • Meat/Seafood
  • Dry Goods
  • Produce
  • Freezer/Dairy
In most grocery stores, these are your major geographic areas. You will want to transcribe the list of ingredients that you still need to purchase into these quadrants. If the quantities are specific, list the amount you need of each thing as well.


(My list includes items I need for other meals, not just the one specifically shown above)

Then, take your shopping list with you to the store, and enjoy a very directed shopping trip that does not leave you running from one end of the grocery store to the other, back and forth!!!!